Though fiber splints are very popular now a days, a conventional method can sometimes prove to be very useful especially keeping in mind the economical condition of the patient. Moreover one more very strategic situation for wire only splint is if the procedure is to be done in the maxillary anterior tooth.
The major advantages are
No need for removal of tooth structure, as needed in wire and acrylic splint.
No interference in occlusion while using in maxillary arch.
 The above picture shows the upper anterior teeth in traumatic occlusion which has caused considerable mobility of the teeth.
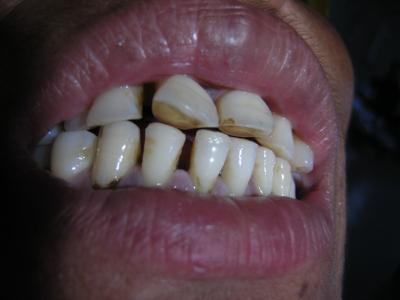
The lower teeth were reduced a bit with the help of diamond burs in order to relieve occlusion. Now a small amount of space is clearly visible between the upper and lower teeth.
The process of wire splintig starts by using a 28 or 26 gage wire. The wire is first of all prestretched by holding it with the help of needle holders at each end.
The first segment of wire about 25 cm is cut from the parent wire. Other 6 to 8 segments are made measuring about 10 to 12 cm long. Please note that the cut made with the help of the wire cutter should be at angle of about 45 degrees and not perpendicular to the wire. This ensures the easy passage of the wire through the interdental spaces.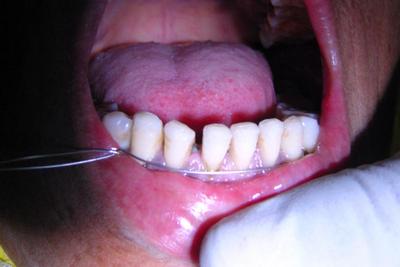
The first longer wire is passed through the interdental space between canine and first premolar on one side to the same on the other side. The wire is then brought back to the starting point and then the two ends are twisted together. Care should be taken not to tighten the wire at this point of time. It should be left a bit slack. 
Now the smaller segment is taken and it is passed from below the already tied wire, and grasped as it passes towards the lingual. The wire is the passed from lingual to buccal but now it should from above both the wires and from the next consecutive interdental space. The wire is then tied against the tooth as shown in the above picture. The main wire is now tightened a bit more, but not to the fullest.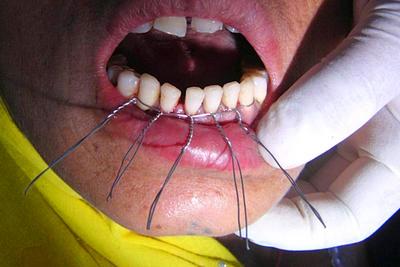
Similar procedure is repeated for each tooth in the concerned area.
In the above figure all the required teeth have been tightened.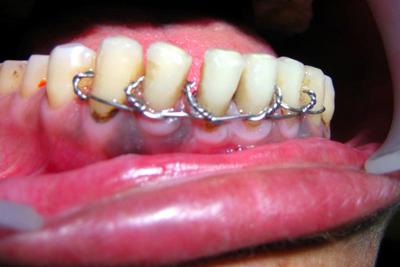
The wires are then cut in the twisted portion about 6 to 7 mm or long enough to be grasped and tucked in the interdental spaces or embrasures. The final result after wire splinting with wire ends in place.
SINCERE THANKS FOR TAKING TIME OFF TO VISIT THIS PAGE
Dr. Hamid Raihan


1 comments:
Positive Association
An eagles egg hatched in a chickens nest will dare not think of gliding on the ferocious turbulence of breeze, miles up the green grounds. Positive environment boosts productivity. Associate yourselves with active bloggers. In the era of social networking and @twitter it cannot be easier.
Post a Comment